Category Archives: Five Room Dungeons

5 Room Dungeon Compilation PDF

Ok, so this went faster than I thought. It’s a long way from professional, but it at least gets the five 5 Room Dungeons for Mini Six/Open D6 into one location. It was also good practice for future compilation PDFs I’m hoping to do (hello, Demons of Adad Untash and Tlactoztlan). So, without further ado, here it is, your chance to…

Download the 5 Room Dungeon Compilation (10141 downloads )

If you print the cover separately and then duplex the rest you should be able to have a dandy little booklet, even. I failed to make it booklet-able without that step, though. Because I’m not really all that good at layout it seems. Enjoy it all the same!

Print Friendly, PDF & Email

5 Room Dungeon: The Fire Giant’s Forge

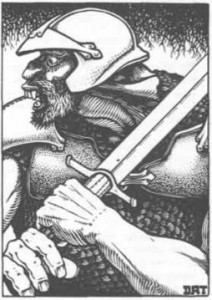
Fire GiantWherein your humble scribe presents a Five Room Dungeon for use with Mini Six, with some creation help from the random tables in D6 Fantasy Locations. This is, of course, largely compatible with D6 Fantasy as well.

The grim, human-hating Fire Giant Matulek has a new plan. With the help of a powerful kobold shaman he has summoned the demon Kuula Gaahal and bound it into the forge that stands within the walls of his castle. There, on the Island of Fire within the caldera of the volcano men call Mount Kurash, Matulek is producing demonic steel for the dark dwarves of Doborgajn to turn into weapons that will lay waste to mankind once and for all. King Borvalf of Tolvir has called upon the mightiest warriors of the land to storm the giant’s castle and destroy the forge lest Matulek’s evil plan come to fruition and darkness once again claim the lands of the north.

Room One: Entrance and Guardian(s)

A single stone-and-mithril bridge spans the lava moat the surrounds the Island of Fire. Its gatehouse is guarded by two dim-witted hill giants, Mrog and Urr’m, and a lone, lazy Hell Hound who answers to the name of Vorom. The guards have been ordered to kill any humans who approach, as well as any non-humans traveling in the company of the hated race. Mrog and Urr’m, sadly, have never seen a human and aren’t entirely sure what they are supposed to be looking for. Vorom knows the smell of humans, but has found it nearly impossible to communicate with the two stupid giants. He can only hope to lead by example.

Mrog & Urr’m, Hill Giant Guards (Scale +2D)
Might 5D+1 Agility 2D+2 Wit 1D+1 Charm 1D+2
Skills: Brawling 6D+1, Club 7D, Intimidation 5D+1
Gear: Furs & Skins (+3), Big Club (+2D)
Static: Dodge 8, Block 19, Parry 21, Soak 16 (3)

Vorom, Hell Hound (Scale 0)
Might 4D Agility 6D Wit 2D Charm 2D
Skills: Brawling 6D (claws 5D damage), Spew Flame 6D (damage = 8D – Dodge Roll, once per three rounds)
Static: Dodge 18, Block 12, Soak 12

Room Two: Puzzle or Roleplaying Challenge

The bridge across the moat of lava is wide and sturdy, expertly crafted of starrock and mithril by the dark dwarves of Doborgajn. There is, however, more to this bridge than meets the eye. During its construction more than a few of the dark dwarves perished, and their spirits haunt the pathway that leads to Matulek’s castle. These ghosts are malign and must be appeased or else they will utilize their limited powers over the physical world to kill anyone attempting to cross the bridge by summoning up a terrible wind to push the travelers over the edge and into the moat of lava below.

The one sure way to appease the prideful dwarf ghosts is to praise their workmanship, as well as that of their ancestors and descendants, sufficiently. These spirits are susceptible to flattery but have a keen ear for insincerity and will react poorly if they sense that the speaker(s) are false in their words. A Lore check vs TN 18 should provide enough information about the dark dwarves of Doborgajn to allow substantial yet sincere flattery.

Room Three: Trick or Setback

The great gate of Matulek’s castle stands shut at the end of the bridge. Only the mightiest of creatures (or, perhaps, a number of less mighty creatures working in concert) can hope to push the towering brass doors open. To accomplish this herculean task a Lift check against TN 23 must be made. Further, the doors themselves are filled with molten lava, which makes handling them a sure way to suffer terrible burns. Each attempt to open the doors much be accompanied by a Stamina check against TN 13. Failure on this check results in 5D damage. Success yields only 2D damage. No damage is delivered to individuals who are resistant to fire damage (such as, perhaps, a recipient of the Resist Elements spell).

Room Four: Climax, Big Battle, or Conflict

In the heart of the castle stands the Fire Giant’s Forge. Matulek works tirelessly, day and night, turning raw ore into pure demonic steel with the aid of the captive demon Kuula Gaahal. Matulek will immediately attack any who dare to enter and will defend his castle and forge to the death. Kuula Gaahal, whose essence is imprisoned within the forge itself, cannot affect the battle (and wouldn’t if it could).

If Matulek is defeated Kuula Gaahal will begin reaching out to the heroes telepathically, begging for them to destroy the forge. If they do, Kuula Gaahal will be freed and will instantly return to its home plane. Thus freed, the demon will think kindly on its rescuers and may one day return the favor. If, however, the heroes refuse to destroy the forge and leave Kuula Gaahal trapped, it will hold an eternal grudge against the party and, if it ever manages to escape, will most certainly have its vengeance.

Matulek, Fire Giant (Scale +4D)
Might 7D Agility 2D Wit 3D Charm 3D
Skills: Brawling 7D+2, Sword 8D+1, Throwing 5D, Intimidation 7D
Gear: Bronze Armor (+6), Demonic Steel Flamesword (+3D+2), Thrown Boulder 8D
Static: Dodge 6, Block 23, Parry 25, Soak 21 (6)

Room Five: Reward, Revelation, Or Plot Twist

Deeper within the castle is Matulek’s treasury. Here the fire giant keeps a large hoard, and a sizable fortune in gold and platinum coins can be hauled away.

Here also is the stash of demonic steel that has been forged so far. There is enough demonic steel for two score man-sized weapons. This material, which is essentially priceless – at least to those who are not bothered by its nature – can be liberated with relative ease.

Weapons made of demonic steel grant a +1D damage bonus. Further, all damage done by such a weapon is much harder to heal. Spellcasters face a −2D penalty when attempting to cast healing on such a wound and the Might check for natural healing of such a wound incurs a −1D penalty.

Being in possession of a demonic steel weapon lends a distinctly evil cast to the wielder, imposing a −2D penalty to all “positive” Charm rolls (i.e., Command or Diplomacy, but not Intimidation).

Most “civilized” weapon makers will either refuse to work with the material or will charge hefty “My soul is imperiled just handling this stuff” fees if they are willing to work the stuff.

Print Friendly, PDF & Email

5 Room Dungeon: Into Yamahari Forest

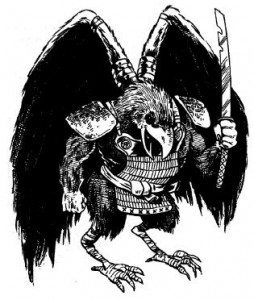
Mischievous TenguWherein your humble scribe presents a Five Room Dungeon for use with Mini Six, with some creation help from the random tables in D6 Fantasy Locations. This is, of course, largely compatible with D6 Fantasy as well.

War is coming to Okibu Province! The forces of the Nakayama Clan are gathering near the borders and Daimyo Nakayama Yosuke has his eyes on the throne of Watanabe Castle. Lady Watanabe Euiko has requested that you take the daisho of retired samurai Murakami Shoichi, once the master strategist of Lord Watanabe’s army, to his hermitage deep within the high forest and convince him to return and lead the Watanabe forces as they seek to defend their Daimyo’s lands (and daughter) against the depredations of the Nakayama barbarians.

Room One: Entrance and Guardian(s)
Yamahari Forest, and the mountains that surround it, are the territory of a pair of mischievous Tengu named Hito and Jito. These two crow-like humanoids are ferocious combatants if angered, but are far more inclined to play tricks on travelers – at least those who show the proper respect to the forest and its masters.

A favorite of these tricks is to have Hito shape change into the form of a Buddhist monk and pretend to be dead, lying in the path of a group passing through Yamahari Forest. Jito will then circle the area, using his illusion powers to create a tableau of Bakemono stomping though the trees. Once the travelers have been tricked into paying attention to the outside threat, Hito will rise up, scare the group, and fly away cackling.

Hito and Jito will only engage travelers in combat if the group is particularly hostile or threatening towards the Tengu themselves or anyone else within Yamahari Forest.

Hito and Jito, Tengu (Scale 0)
Might 4D+1 Agility 4D+2 Wit 4D+2 Charm 4D+1
Skills: Sword 5D+1, Dodge 5D+2, Magic 6D+2
Perks: Sorcerer, Flying
Gear: Fine Katana (+3D), Leather Armor (+2)
Spells: Charm, Control Weather, Illusion, Invisibility, Shape Change, Teleport
Static: Dodge 17, Block 13, Parry 16, Soak 13 (2)

Room Two: Puzzle or Roleplaying Challenge

The narrow path through Yamahari Forest occasionally widens to accommodate a shrine to one of the 10,000 gods of Akashima. At a shrine dedicated to Kanzeon the group encounters the old (but still spry and stunningly beautiful, of course) Jen-Mai, a tea trader. Jen-Mai frequently passes through Yamahari Forest and knows much of its inhabitants. She can, if flattered and treated well, give the seekers great insight into both the Tengu who protect the forest as well as any other subject relating to the area.

Jen-Mai is also more than a little familiar with the subject of Murakami Shoichi, having been quite infatuated with him when they were both much younger. She is aware that he makes his home nearby, but she has never approached him because of the difficulty in reaching his high cave, which is located on the southern face of the 2nd tallest hill within Yamahari Forest. Jen-Mai also knows that Shoichi’s favorite tea is Gyokuro, an expensive and rare delight that she just happens to have in stock. Perhaps the old man will be more favorably inclined to listen to the group if they present him with a gift?

Jen-Mai poses no danger to anyone, and will only fall to the ground weeping if threatened. If anyone should press their attack further, Hito and Jito will come to her defense. They will not be pleased with the situation and will deal harshly with anyone so crass as to take advantage of an honorable and respectful little old lady like Jen-Mai.

Room Three: Trick or Setback

The southern slope of the hill atop which Murakami Shoichi resides is a steep climb, rocky and difficult to ascend. A Climbing check against TN 18 is necessary to make any significant headway, and should be repeated a total of three times to see if the rise can be crested. Further, Shoichi has carefully concealed a couple of traps along the way, all the more to discourage unwanted visitors. These traps take the form of loosened rocks that are otherwise ideal handholds for climbing. A Traps roll vs TN 18 (better than a 21 on the Climbing roll immediately preceding the trap) will successfully avoid “triggering” the traps. There is one trap immediately after the first Climbing roll and another immediately after the last Climbing roll. In both instances, a person triggering the trap will tumble the full distance back down to the bottom of the hill, losing all progress gained. A person falling from the 1st trap site will suffer 2D damage. A person falling from the 2nd trap site will suffer 5D damage.

Room Four: Climax, Big Battle, or Conflict
A group of a dozen or so soldiers of Clan Nakayama are gathered around the outside of Murakami Shoichi’s cave. They were sent by Lord Nakayama himself to abduct the old samurai to force him into service against his old master. They must have approached from the north and worked their way around. They now find themselves on the receiving end of the great warrior’s wrath. At present he is firing arrows at them from within his cave even as they prepare to rush in and overwhelm him with their superior numbers.

Nakayama Soldiers (Scale 0)
Might 3D Agility 2D+1 Wit 2D Charm 1D+2
Skills: Naginata 3D or Sword 3D+1 or Spear 4D, Dodge 3D+1
Gear: Naginata (+3D) or Katana (+2D+2) or Yari (+2D), Ashigaru Armor (+5)
Static: Dodge 10, Block 9, Parry 9/10/12, Soak 9 (5)

Room Five: Reward, Revelation, Or Plot Twist

Helping chase away the Nakayama soldiers and presenting him with his old daisho will do much to open Murakami Shoichi’s eyes and soften his heart to the seekers’ entreaties on behalf of Lady Euiko. However, Shoichi remains reluctant to leave his hermitage and return to the ways of war. He can be convinced, but good roleplaying should be required here. Successfully convincing Murakami Shoichi is a significant challenge, but the GM should not stonewall the players. Appeals to his honor, or to his duty to the Watanabe family, or indictments of the Nakayama “barbarians” will eventually get to the old man. They will do so much sooner if he is able to enjoy a nice pot of Gyokuro tea while listening to them.

The retired samurai’s stats are presented below in case the seekers offend him or attempt to abduct him. If a fight breaks out between the seekers and Shoichi, Hito and Jito will arrive in 1D turns to aid their tenant.

Murakami Shoichi, Hermit Samurai (Scale 0)
Might 3D+1 Agility 3D+1 Wit 4D Charm 3D+1
Skills: Sword 5D+1, Naginata 5D+1, Dodge 5D+1, Bow 5D+1, Tactics 7D, Strategy 7D, Leadership 6D+1
Gear: Naginata (+3D), Katana (+2D+2), Heavy Furs (+2 armor)
Static: Dodge 16, Block 10, Parry 16, Soak 10 (2)

Once Shoichi has been convinced to return to Watanabe Castle, it can be safely assumed that he devises a brilliant defensive strategy and the Nakayama invasion is repelled. Those who returned the old man to assist his Lord are feted and rewarded appropriately. Or, if the GM desires, the entire campaign against the Nakayama could be played out. But that’s as far as this five room “dungeon” goes.

Print Friendly, PDF & Email

5 Room Dungeon: The Pyramid Of Kheptah Atemu

Wherein your humble scribe presents a Five Room Dungeon for use with Mini Six, with some creation help from the random tables in D6 Fantasy Locations. This is, of course, largely compatible with D6 Fantasy as well.

Deep within the scorched desert men call Behtep Seretu one will find the great pyramid of Kheptah Atemu, the long-dead Pharaoh of ancient Khemset. Legend tells of a great treasure that was entombed with the Pharaoh – an amulet in the likeness of a scarab, created by the god Khepri himself, that greatly extends the life of its wearer. Like all Pharaohs, Kheptah Atemu must also have been sent to the afterlife with countless artifacts and a kingdom’s worth of gold. True, the legend mentions some kind of curse as well, but those stories are just told to keep away the cowardly, aren’t they? And you, my bloodthirsty gang of tomb robbers, are anything but cowardly.

Room One: Entrance and Guardian(s)

Rising only half its height from the sands in which nine centuries’ worth of storms have buried it stands the great pyramid. A grand archway yawns blackly, inviting the would-be tomb robbers to enter. The climb to reach this doorway is child’s play for any skilled raider. Yet, as the entrance is approached, something strange happens. The faded hieroglyphics depicting the jackal-headed Children of Anubis standing guard on either side of the archway shimmer and begin to move. They detach themselves – paper thin, yet as real as thirst – from the stone walls and attack!

Children Of Anubis (Scale 0)
Might 4D Agility 3D Wit 1D Charm 1D
Skills: Sword 6D, Dodge 6D
Gear: Khopesh (+2D+2)
Static: Dodge 18, Block 12, Parry 18, Soak 12

Room Two: Puzzle or Roleplaying Challenge

The entrance of the pyramid is an enormous, hieroglyphic-covered hallway that descends at a gentle slope, switching back on itself often and abruptly. After a significant amount of this travel, the tomb robbers reach a large, spherical room, across which there is no bridge. A tall, wide spire rises from the center of floor of this room, and runs all the way to the ceiling. A doorway that matches the one the thieves are standing in lies directly across from where the party stands.

Surely there must be some kind of puzzle here, and indeed there is. A Lore check (TN 15) will allow the tomb robbers to recall that at every switchback they passed through on their way here there was a specific, distinctive hieroglyph that appeared nowhere else along the way. Each of these symbols marks an otherwise impossible to see pressure plate. If each plate is depressed in the order they are encountered from the entrance on down the spire will rotate within the circular room such that it will serve as a bridge across the room to the doorway on the other side.

Room Three: Trick or Setback
Deeper within the hallways of the pyramid the raiders encounter a “wall” of fist-sized stone scarabs that continuously rain down from the ceiling and vanish through a narrow drain in the floor. The scarabs fall with alarming velocity, doing 9D damage to anyone who sticks an appendage into the curtain of rain. Any weapon, pole, or other item inserted into the falling scarabs will quickly be battered beyond use. Light and a continuation of the hallway can be occasionally glimpsed through brief gaps in the rain of scarabs.
Upon further inspection it can be noted that a very narrow path may be navigated through the falling scarab stones. To do so requires a series of three Contortion checks against a TN of 15+ the number of dice the character has in Might. Failure results in 3D damage and a retreat by one step, such that the number of Contortion checks needed returns to its previous value.

Once a character has made it through this obstacle and reached the other side, a row of three levers can be seen further down the hallway. When set to the proper sequence (Up/Down/Up) the rain of scarabs will cease for a brief period during which two people may cross the “wall.” A third person attempting to cross must make an Agility check vs TN 13 or be caught in the restarted rain of scarabs, taking 3D damage. Fourth and subsequent individuals may not cross (without taking the 9D damage, that is) until the levers have been set to turn the rain off again.

Room Four: Climax, Big Battle, or Conflict

The burial chamber of Kheptah Atemu is large and airy. Sunlight fills the room, streaming in from carefully crafted shafts built into the pyramid itself. The room is also completely silent – having been enchanted to eliminate all sound. In addition to making communication between tomb robbers quite difficult, this divine silence prevents the casting of any spells within the confines of this room.

These serene beauty of the scene is marred by jarring evidence of a long-passed massacre. Multiple skeletons, some dressed in the garb of burial attendants, some seeming to have been royalty as indicated by their accoutrements, lie strewn about the room, their bones shattered, their skulls fractured, and so on.

A beautiful lapis and gold sarcophagus decorated with numerous scarab designs stands at the center of this room. A Lore check (TN 12) reveals that the ancient Khemseti held the scarab to be a sign of rebirth. Those opening the sarcophagus (Lift check TN 30 – up to 4 characters may add their Lift rolls together to remove the heavy golden lid) will soon discover just how real the belief in rebirth can be, as the mummified body within the sarcophagus returns to life and attacks the thieves.

Kheptah Atemu, Mummified Pharaoh (Scale 0)
Might 5D Agility 1D Wit 1D Charm 1D
Skills: Brawling 7D, Dodge 2D
Gear: Scarab Amulet Of Khepri (+6 armor, allows wearer to regenerate)
Static: Dodge 6, Block 21, Parry 15, Soak 15 (6)

The Scarab Amulet, worn by the mummified Kheptah Atemu, provides divine armor and allows its wearer to regenerate, but it does so at a great cost. Whosoever wears this amulet cannot remove it and will return from death each time he dies with a permanent, cumulative 1D reduction to all Attributes. Only when all Attributes have reached 0D will the wearer truly die. So deceased, the wearer will become a mummy (as the one above) bereft of free will and incapable of any action other than horrific, unstoppable violence directed towards any and all – friend or foe. In this state only can the wearer be killed and the Amulet removed.

Room Five: Reward, Revelation, Or Plot Twist

It is true that Kheptah Atemu was buried with a kingdom’s worth of gold. Numerous golden idols, statues, and trinkets are kept within a secret room located just off the main burial chamber. This room can be found with a Search check against TN 20. In addition to the valuable treasure – which is too much for any small group to carry easily or far in the Behtep Seretu desert – a papyrus scroll is found that, if it can be deciphered (Lore check, TN 25), tells the story of the Amulet of Khepri and what befell Kheptah Atemu as he wore it.

This room has been trapped to release a dehydrating dust upon all who enter it. The trap may be discovered and disarmed with a Traps roll against TN 22. If not disarmed, it will activate and each person exposed to the dust must succeed in a Stamina check against TN 20 or become afflicted with an unslakable thirst. Afflicted thieves will immediately become Wounded and will continue to decline along the Wound Level track one step per hour until they perish unless they can consume 5 gallons of water within 5 hours – a difficult proposition this deep in the desert. A more disturbing cure is to consume 1 gallon of fresh human blood, which those afflicted will actively thirst for.

Print Friendly, PDF & Email

5 Room Dungeon: The Temple Of Vashti Nimarita

Wherein your humble scribe presents a Five Room Dungeon for use with Mini Six, with some creation help from the random tables in D6 Fantasy Locations. This is, of course, largely compatible with D6 Fantasy as well.

In the jungle city of Kharasoo there is a temple dedicated to Vashti Nimarita, the goddess of glorious & lustful battle. The priestesses who tend this temple have captured and enslaved a Naga Demon to guard their holiest treasures, which are said to include more than 10,000 rupees and weapons once wielded by Vashti Nimarita herself in the great battle against the Utosh. Desperate thieves, or perhaps non-believers from the outside world, might be tempted to sack the temple and take what treasures can be hauled away…

Room One: Entrance and Guardian(s)

Much of the temple is open and accessible, though well-armed or armored individuals, especially males, will likely draw attention. Beyond the three great courtyards and the seven silver fountains one will find a well-guarded entrance to the heart of the temple. Four guards and an attending priestess are always present here, to discourage any would-be trespassers. The guards and priestess are more than willing to engage in battle, though they have been ordered to use other methods to keep intruders away if at all possible. Their appealing, naked, and henna-covered bodies tend to make this easy more often than not.

Sanshara, Neshali, Tapanji, and Sanjeeta, Temple Guards (Scale 0)
Might 2D+1 Agility 3D Wit 2D Charm 2D+2
Skills: Sword 3D+1, Dagger 3D+1, Dodge 4D, Throwing 4D, Lore 3D, Command 3D+2, Seduce 3D+2
Gear: Nair Temple Sword (+2D+1), Kukri (+1D), Chakram (+1D+1)
Static: Dodge 12, Block 8, Parry 10, Soak 8

Swali Jagra, Attending Temple Priestess (Scale 0)
Might 2D Agility 2D Wit 4D Charm 3D
Skills: Dagger 3D, Dodge 4D, Throwing 3D, Lore 6D, Magic 6D, Seduce 4D
Perks: Sorcerer
Gear: Phurba (+1D+1), Chakram (+1D+1)
Spells: Bless, Charm, Fly, Petrify, Shape Change, Slumber
Static: Dodge 12, Block 6, Parry 9, Soak 6

Room Two: Puzzle or Roleplaying Challenge

The first inner sanctum of the temple is watched over by the spirits of Gheeta, capricious wind elementals who are the only creatures capable of manipulating the wind-locks that seal this room from the deeper portions of the temple. Only by persuading the Gheeta that they should allow passage through the wind-locked door can a party of thieves hope to proceed. A successful Lore check against TN 20 will reveal the legend that Gheeta desperately long to be human and can become so – for brief periods at least – if given a bowl of honey. Surely these creatures would bargain for passage?

Room Three: Trick or Setback

The second inner sanctum of the temple is trapped! The door to this large room will slam shut once a single person has crossed the midline and will then quickly fill with sand, trapping and killing any who occupy it. The only way to stop this flow of sand is to hurl a chakram into a specific slot hidden in the far wall. A Traps roll against TN 18 will identify the mechanism and target for shutting off the trap itself. A Throwing check vs TN 24 is necessary to throw the chakram accurately enough to stop the trap. Two minutes (12 rounds) is all the time thieves will have before they are buried alive.

Room Four: Climax, Big Battle, or Conflict

The fourth great courtyard is now all that stands between temple robbers and their goal. It is here that the priestesses of Vashti Nimarita have bound the Naga Demon Vikram Kirat. This terrible creature possesses the head of a giant, stunningly beautiful human male attached to the body of a tremendous snake. Vikram Kirat speaks with a deep, soothing voice and attempts to persuade all who enter the room into giving up their souls to it in exchange for a great reward. Those who strike this bargain with the demon are instantly destroyed on this plane of existence and suffer a fate that will never be known here. Those who refuse must ultimately engage the Naga Demon in direct combat.

Vikram Kirat, Naga Demon (Scale +2D)
Might 5D Agility 3D Wit 2D Charm 5D
Skills: Brawling 6D, Dodge 4D, Throwing 4D, Command 6D, Diplomacy 6D, Persuasion 6D
Perks: Energy Blast (4D damage/Throwing skill)
Static: Dodge 12, Block 18, Parry 15, Soak 15

Instead of suffering wound level penalties in combat, the Naga Demon gains equivalent bonuses and cannot be incapacitated (though it does gain the +3D bonus at that stage), only killed. If killed, the Naga Demon is released from its bindings to the temple and will turn to dust and blow away, only to reform some other place in 99 days.

Room Five: Reward, Revelation, Or Plot Twist

Temple thieves who reach this room are rewarded for their efforts by the sight of more than 10,000 rupees and a small arsenal of magically enhanced weapons (+1D to hit, +1D damage in most cases, though possibly some stronger or weaker variations are present).

Any females who take from this treasure are, in a brief and painful flash of light, marked with permanent henna-like tattoos that identify them as priestesses of Vashti Nimarita. Any males who take from this treasure are instantly – and just as painfully – transformed into such henna-inked females.

Thieves can be returned to normal by the successful casting of a Dispel Magic spell against TN 25.

Print Friendly, PDF & Email

5 Room Dungeon: Cave Of The Kobold Seer

Wherein your humble scribe presents a Five Room Dungeon for use with Mini Six, with some creation help from the random tables in D6 Fantasy Locations. This is, of course, largely compatible with D6 Fantasy as well.

Goblins have always been a problem for caravans between Woodville and Stonekeep, but lately they have been plaguing the trade routes with greater accuracy than ever before. The party has been hired to determine how the Goblins are managing these highly successful robberies.

Some careful tracking from the site of the last attack has lead the heroes (following the trail of what appears to be two Goblins who split off from the rest of the raiding party) to a hidden cave deep within the Jorngast Forest.

Room One: Entrance and Guardian(s)

Well-hidden beneath carefully placed brush is a cave entrance that the Goblins’ tracks appear to enter. A simple crossbow trap has been placed here, aimed to shoot anyone taller than a Goblin who disturbs the brushy cave covering. A Search roll (TN 15) will spot it. A Dodge roll (TN 18) is necessary to avoid the bolt. If not dodged, the bolt does 4D+1 damage.

A short passageway leads to a cramped cavern where a half-dozen hungry, ill-trained Kobold Warriors loiter. They will happily attack any intruders who look like they might have (or be) food. The Kobolds will attempt to flee – heading for the outside – once they have lost 1/2 their number.

Kobold Warrior (Scale 0)
Might 1D+1 Agility 2D+2 Wit 1D+2 Charm 1D+1
Skills: Javelin 2D+1, Dodge 3D+2, Stealth 3D+2, Traps 2D+2
Gear: Javelins (+1D), Leather Armor (+2)
Static: Dodge 11, Block 3, Parry 7, Soak 3 (5)

Room Two: Puzzle or Roleplaying Challenge

Three Kobold Lieutenants sit about this mid-sized cavern, gambling with knucklebones by candlelight. If the players can beat the Kobolds at their game (skill resolution required: Gambling, Wit-based) and convince them that they are here “on business” (roleplaying resolution required, fairly easy since the Kobolds are lazy and would rather let the trap in the next room do the hard work), the guards will let them pass without a fight. These Kobolds will also lay in ambush for anyone coming back into this room from the rope bridge cavern ahead.

Bik, Haarlit, and Fythang, Kobold Lieutenants (Scale 0)
Might 1D+2 Agility 3D Wit 1D+2 Charm 1D+1
Skills: Javelin 2D+2, Dodge 4D, Stealth 4D, Gambling 2D+2
Gear: Javelins (+1D), Leather Armor (+2), Shield (+4)
Static: Dodge 12, Block 5, Parry 8, Soak 3 (9)

Room Three: Trick or Setback

A deep chasm cuts across this cavern, a fast moving and rocky stream lies some 40 feet below. A ratty-looking rope bridge spans the gap. The chasm is almost too wide to jump, but a very skilled (or lucky) person might make it across (TN 20, using Athletics).

The bridge itself is trapped. Its ropes have been carefully frayed to cause them to snap if traversed by anyone heavier than a Goblin. A Search check (TN 15) will notice the trap. A person falling with the bridge can make an Athletics roll (TN 18) to avoid suffering damage (4D) from the fall and may then climb up the other side.

Room Four: Climax, Big Battle, or Conflict

The Kobold Seer and two emissaries from the Goblin King sit at a battered and wax-covered old table. The seer speaks to the Goblins in a gravelly and grandiose voice, telling them of visions and prophesies. These conspirators are not pleased to be interrupted by pinkies and will immediately move to attack. The Goblins will fight to the death in an effort to preserve their king’s lucrative raiding scheme. The Kobold has no such desire to die and will, if the fight begins to go against him, attempt to cast Invisibility and flee.

Vumra, Kobold Seer (Scale 0)
Might 1D+1 Agility 2D+2 Wit 3D Charm 3D
Skills: Dagger 2D+1, Dodge 3D+1, Magic 6D, Command 4D
Perks: Sorcerer
Gear: Dagger (+1D+1) -> magic, +1D to hit, +2 pip damage
Spells: Control Weather, Curse, Divination, Hasten, Heal, Invisibility, Paralysis
Static: Dodge 10, Block 4, Parry 7, Soak 4

Niish & Padlum, Goblin Emissaries (Scale 0)
Might 2D Agility 3D Wit 2D Charm 1D+1
Skills: Sword 4D, Dodge 4D, Stealth 3D+2
Gear: Short Sword (+2D), Leather Armor (+2), Shield (+4)
Static: Dodge 12, Block 6, Parry 12, Soak 6 (12)

Room Five: Reward, Revelation, Or Plot Twist

The Seer’s chamber, contains a small trove of gold coins (454), a rough seeing crystal (+1D+2 to Clairvoyance & Divination attempts), and his star charts and diary of prophesies, including information on where and when the Goblins have been told will be good times to attack the trade routes for the next six months. Surely the Merchants’ Guild in Stonekeep will pay a handsome reward for this information!

Print Friendly, PDF & Email